What makes it whitebox
Traditional automated scanners probe your application from the outside. Mjolnir starts from the inside, reading your source code to understand your routes, authentication flows, data models, and business logic before it ever sends a single request. This means it finds vulnerabilities that black-box tools miss: logic flaws, broken access controls, misconfigured authorisation chains, and authentication bypasses that only make sense once you understand the code behind them.How a run works
A run moves through five phases, which the run dashboard tracks live on a phase stepper.1
Analysis
Mjolnir reads the repositories you’ve connected, builds a map of your routes, middleware, data models, and authentication boundaries.
2
Recon
Mjolnir crawls your application and cross-references what it finds with the code map to build a complete picture of the attack surface.
3
Planning
Based on the attack surface, Mjolnir generates targeted test cases for each vulnerability category and queues them for execution.
4
Attack
Test cases are executed against your target URLs. Mjolnir generates its own user contexts as it explores, so you don’t need to supply test accounts.
5
Report
Confirmed findings are written up with severity ratings, reproduction steps, and suggested fixes, then pushed straight to your issue tracker if you have one connected.
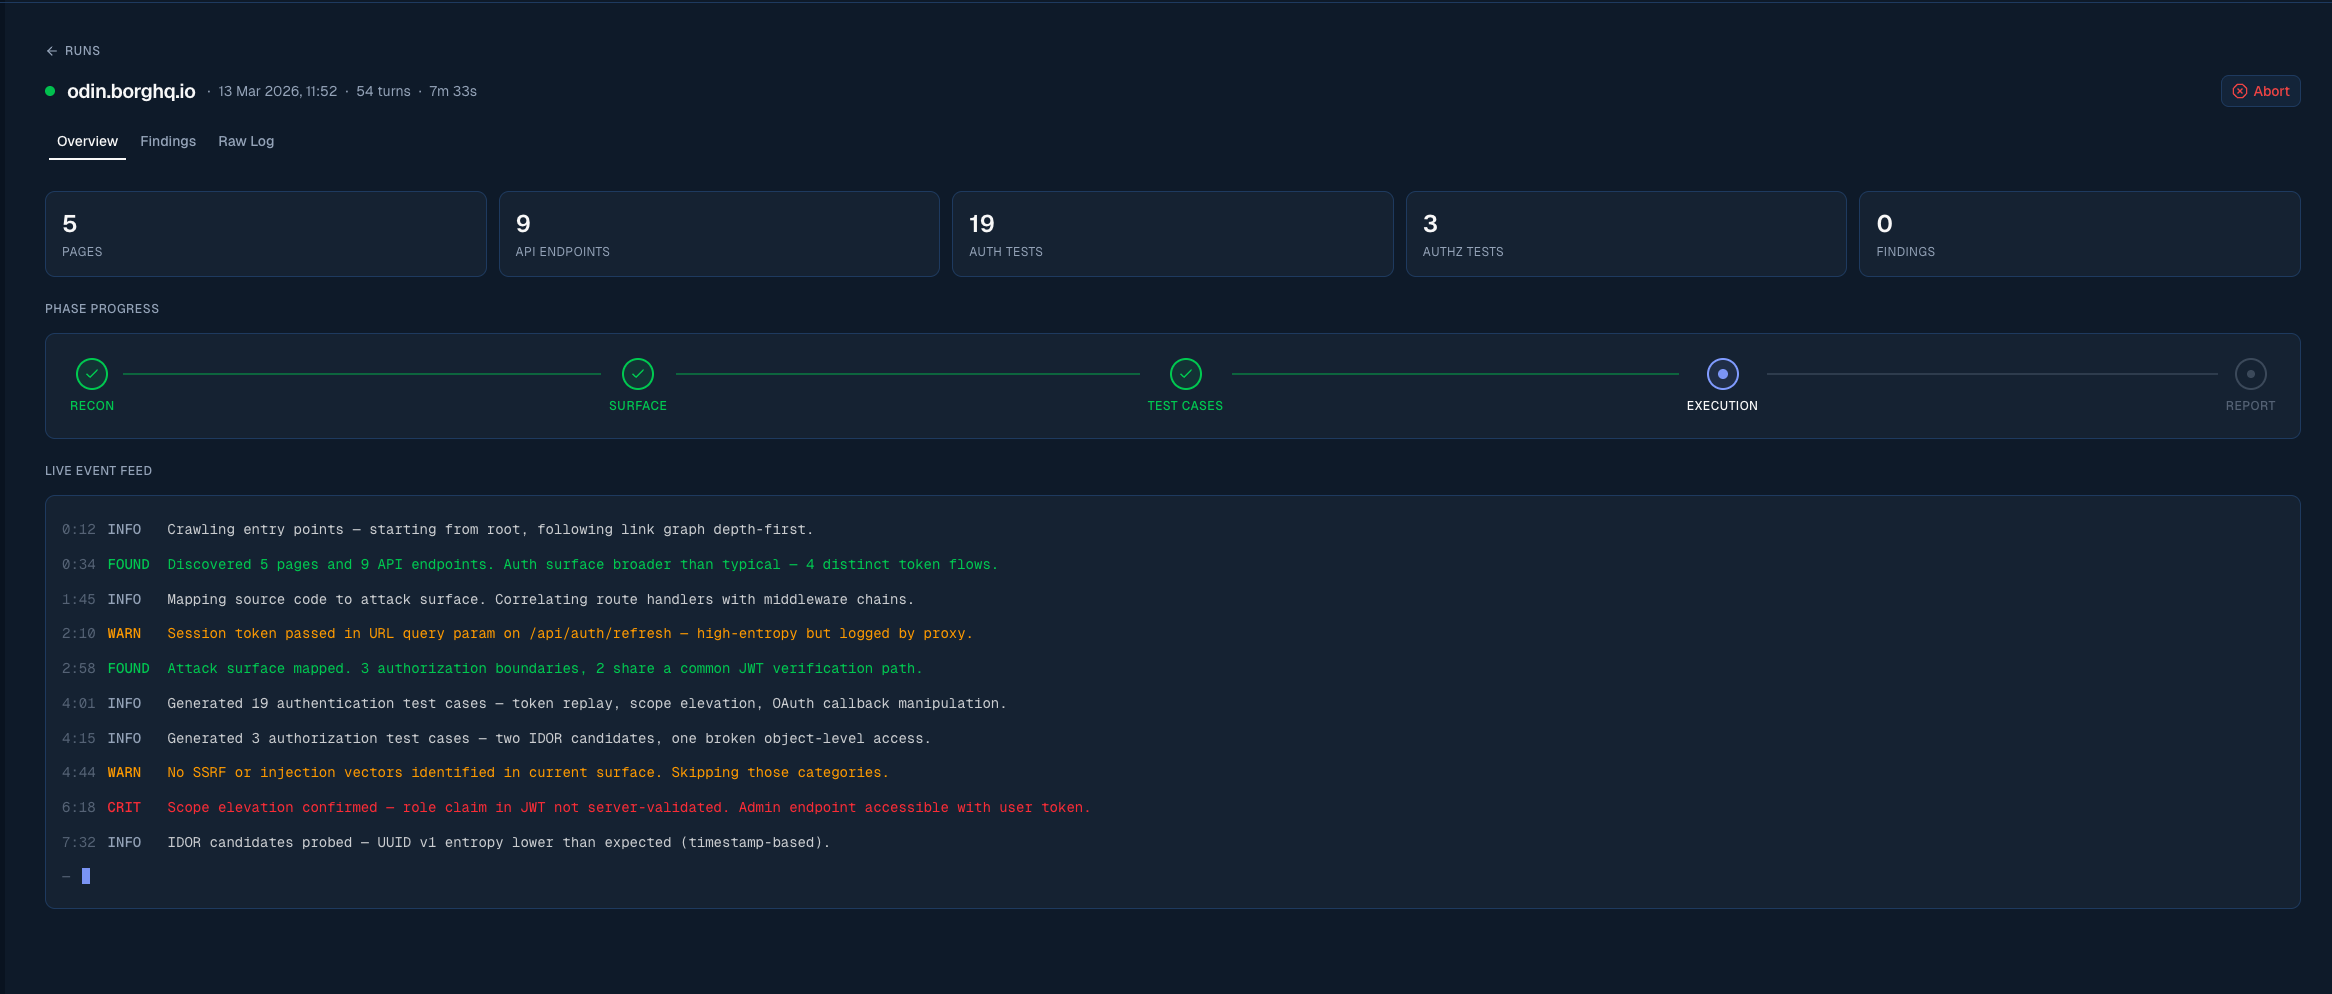
The Mjolnir run dashboard lets you follow the assessment in real time
What Mjolnir tests for
Mjolnir generates test cases across a broad range of vulnerability categories, including:Authentication
Login bypasses, weak credential policies, session fixation, token leakage, and insecure password reset flows.
Authorisation
Privilege escalation (vertical and horizontal), broken access controls, IDOR, and missing function-level checks.
Injection
SQL injection, NoSQL injection, command injection, SSTI, and other server-side injection vectors.
Data exposure
Sensitive data in responses, overly permissive API fields, PII leaks, and missing data redaction.
Test users
Mjolnir generates the user accounts and authentication contexts it needs on its own as it explores your application. For most applications, you don’t need to provide test users. For enterprise customers with complex multi-step authentication flows — for example, multi-tenant onboarding sequences or workflows requiring a specific sequence of API calls — Borg’s senior security engineers can manually inspect the application and prepare a tailored Mjolnir configuration that captures those flows. Contact us at [email protected] if you need this. Self-serve test-user supply for client-supplied accounts is coming. We’ll update these docs when it ships.Pricing
Your Borg subscription covers the full Odin platform: continuous asset discovery, findings management, issue tracker integration, and reporting. Your active plan grants recurring credits that are used for Mjolnir runs and CAD deductions. Mjolnir usage is deducted from credits based on your selected plan tier. If a Mjolnir run completes without confirming any vulnerabilities, you don’t pay for it. See Billing for tier details and how to activate.Setting up a run
A Mjolnir run is configured through a five-step wizard:
If your organisation doesn’t have an active plan yet, launching takes you to Stripe Checkout to complete the purchase — payment, billing address, and VAT/tax ID are all collected there. Your setup is saved as a draft, and you return to it automatically after checkout to launch the run.
Drafts auto-save as you work, so you can come back to a setup at any time.
Start setup: Connect GitHub
Begin the Mjolnir setup wizard