> ## Documentation Index
> Fetch the complete documentation index at: https://docs.borghq.io/llms.txt
> Use this file to discover all available pages before exploring further.
# Quickstart
> Get up and running with Odin in minutes
This guide walks you through the first things to do after logging in to Odin for the first time.
## 0. Accept terms of service
The first time your organisation uses Odin, an **Owner** must review and accept the platform agreements: the Master Services Agreement, the Data Processing Agreement, and the AI Services Addendum. This is a one-time step for the whole organisation.
Non-Owner members see a notice until this is done. See [Terms of Service](/getting-started/terms-of-service) for details.
## 1. Complete your profile
Click your avatar in the top-right corner and select **Profile**. Add your name and a photo. This helps your team identify who made changes and who's responsible for which findings.
## 2. Explore your attack surface
Go to **Attack Surface > Assets** in the sidebar. This page lists everything Odin has discovered about your organisation's internet-facing footprint: domains, subdomains, IPs, and APIs.
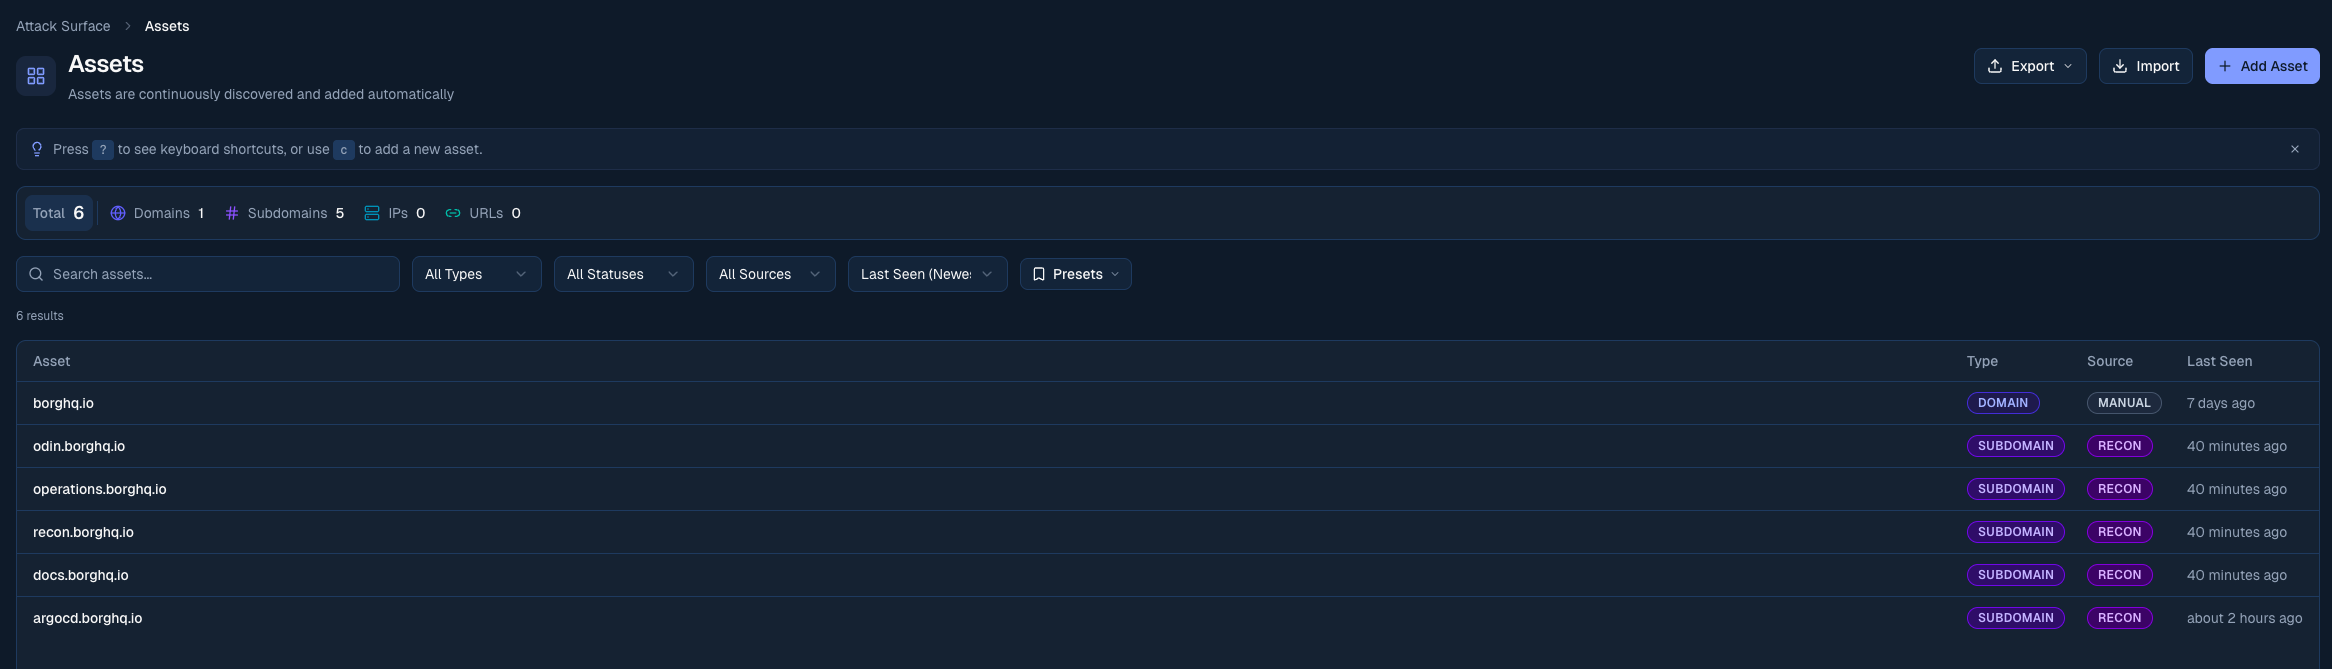 If you've just signed up, asset discovery may still be running. Check back in a few minutes.
## 3. Review your findings
Open **Findings** in the sidebar. Findings are security issues from your assets and pentest runs, sorted by severity.
Use the severity filter to focus on **Critical** and **High** findings first.
## 4. Connect your integrations
Go to **Management > Integrations** to connect your issue tracker. Odin supports Linear, Jira, GitHub, and GitLab. Once connected, findings can be pushed directly to your engineering workflow with one click.
Push findings to Linear
Push findings to Jira
Push findings to GitHub Issues
Push findings to GitLab Issues
## 5. Run your first AI pentest
Go to **Security testing > Full pentests > Launch a pentest** to start the configuration wizard.
The wizard walks you through five steps:
1. Connect your GitHub repositories
2. Define your target URLs and verify connectivity
3. Select repositories and upload supporting documentation
4. Choose a Mjolnir tier
5. Verify domain ownership and launch
Read the full Mjolnir setup guide
## Need help?
If you get stuck at any point, reach out to us at [mail@borghq.io](mailto:mail@borghq.io). We're here to help.
If you've just signed up, asset discovery may still be running. Check back in a few minutes.
## 3. Review your findings
Open **Findings** in the sidebar. Findings are security issues from your assets and pentest runs, sorted by severity.
Use the severity filter to focus on **Critical** and **High** findings first.
## 4. Connect your integrations
Go to **Management > Integrations** to connect your issue tracker. Odin supports Linear, Jira, GitHub, and GitLab. Once connected, findings can be pushed directly to your engineering workflow with one click.
Push findings to Linear
Push findings to Jira
Push findings to GitHub Issues
Push findings to GitLab Issues
## 5. Run your first AI pentest
Go to **Security testing > Full pentests > Launch a pentest** to start the configuration wizard.
The wizard walks you through five steps:
1. Connect your GitHub repositories
2. Define your target URLs and verify connectivity
3. Select repositories and upload supporting documentation
4. Choose a Mjolnir tier
5. Verify domain ownership and launch
Read the full Mjolnir setup guide
## Need help?
If you get stuck at any point, reach out to us at [mail@borghq.io](mailto:mail@borghq.io). We're here to help.